Overview
Title: Let’s Make a Pinwheel
Grade: 4th Grade
Duration: Two – 45 Minute Lessons
Standards
Science – SC.4.E.6.3
Recognize that humans need resources found on Earth and that these are either renewable or nonrenewable.
Hypothesis
Will the pinwheel be able to move by the wind at a rapid speed, using a blow dryer or a fan?
Vocabulary
Renewable • Non-renewable • Composition • Structure • Surface • Energy • Construction • Destructive • Civilization • Natural Resources
Essential Question
What are the differences between renewable and nonrenewable resources?
Background Information
Windmills have been around for a long time. Windmills are one of the first man-made methods of power generation. There are many different types of windmills but the Dutch are best known for theirs. Today, windmills are actually highly refined and carefully engineered turbines that are used for their ability to capture the wind to create a source of power.
Wind turbines, today’s version of the windmill, are usually grouped into large collections of units to produce electricity. These are called wind power plants, or wind farms. They are generally located in agricultural areas where large plots of land are available, and agricultural activities are undisturbed by their action.
Wind turbine farms can also be constructed offshore to make use of winds that sweep over the bodies of water. Wind-powered energy leaves no dangerous waste than can be dangerous to both people and the environment.
This is just another way of generating renewable energy-electricity.
Questions
- Does the Velocity of wind determine the amount of energy produced?
- Does the distance of where the turbine is situated matter?
- Why or why not?
- Would the size of the pinwheel create more or less energy?
- Why or why not?
Materials
- Pinwheel Template
- Straw
- Glue
- Crayons/markers
- Scissors
- Fan/blow dryer
Procedure
- Cut each sheet of paper into a 5.5 inch/14 cm square.
- Students can decorate the squares prior to putting it all together.
- Glue the 2 squares of paper together—make sure the decorated side of the paper is facing out.
- Set aside, let the glue dry completely.
- Use your ruler to make a diagonal line between 2 corners.
- Lightly draw and measure out a diagonal line from 1 corner to the other. Lightly draw a diagonal line between the remaining 2 corners. It should look like an “X”.
- Now cut each lightly drawn line halfway, approximately 5 cm, from the corner to the center.
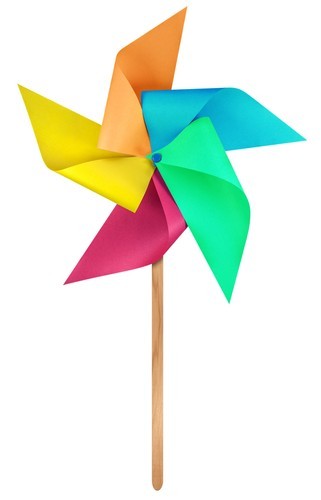
- Now fold 1 corner at a time toward the center.
- Add a small dot of glue on the center of the pinwheel, press and hold down the corner between your thumb and forefinger until it dries.
- Repeat the same process to the remaining 3 corners.
- After the glue has dried, position the plastic straw along the center of the backside of the pinwheel—the top of the straw should not poke out above the top of the pinwheel.
- Secure the straw to the pinwheel by inserting the thumbtack through the center of the pinwheel and the plastic straw.
- Place fan on a stable table.
- Have children stand at least 3 feet from table (Use the yardstick to determine the length) having the wind blow toward the pinwheels.
- Repeat the process at 2 feet then 1 foot as well as the different speeds of either the fan or blow dryer.
- Write down your observations.
Observations
- When you blew straight onto the front of the pinwheel did it spin counterclockwise?
- Did it spin best when you were blowing directly into the pinwheel?
Most pinwheels have the blades arranged so that when wind blows straight at them, they spin counterclockwise. This is because the blades are made so that the oncoming air is captured and pushes the blades in this direction. When wind is blown straight into the face of the pinwheel, it spins.